Learn to Build a ZK Treasure Hunt App and Master Noir Circuits on Scroll
I'm Vedant! I'm a software developer who loves to create awesome web3 and blockchain projects. When I'm not coding, you can find me writing technical articles or exploring new technologies. I'm always up for a chat about the latest tech trends, so feel free to drop me a message!
Imagine you're on a treasure hunt with a map that leads you to a hidden box. The map doesn't tell you the exact location, but it gives you clues about where to dig. You follow the instructions, carefully measuring distances and angles, until finally, you find the treasure.
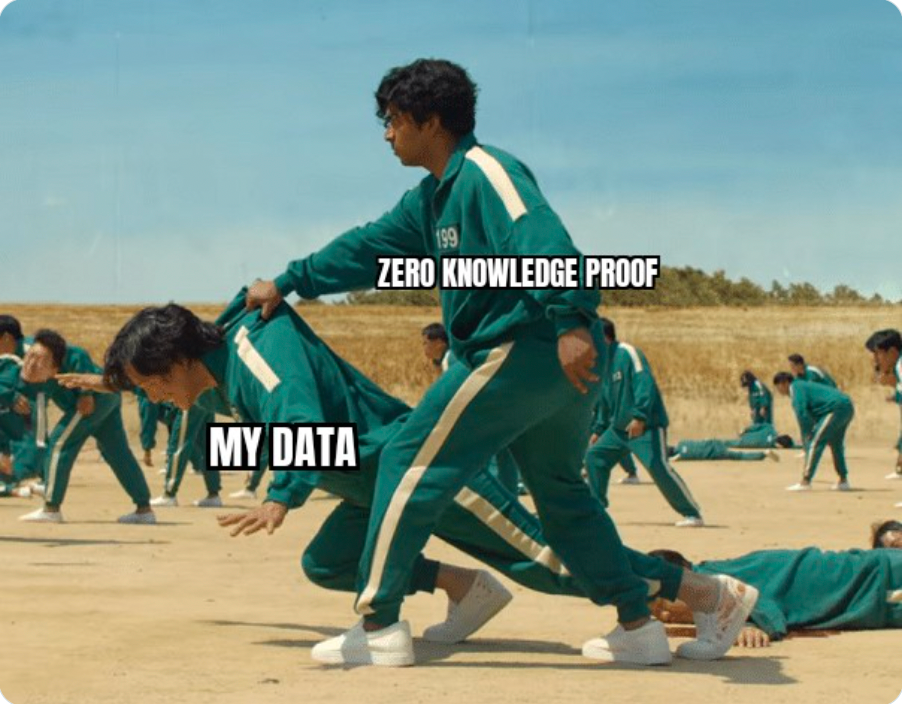
But here's the twist: no one ever sees the map or knows where you dug. You simply prove, using a special technique, that you followed the correct steps and found the treasure without revealing any of the secret details. This is the essence of zero-knowledge proofs (zk-proofs) in a nutshell.
They allow you to prove you possess certain information without actually sharing that information itself. Just like the treasure hunter demonstrating they reached the right spot without showing the map or the answer to the riddle.
🗺 Our Quest
In this article we will construct a zero-knowledge (zk) treasure hunt game on Scroll, utilizing Noir's domain-specific language. Players navigate a grid map guided by riddles, attempting to pinpoint the hidden treasure's location.
We'll also leverage Noir Codegen to generate a Solidity verifier contract, forming the core of our interactive treasure hunt experience.
The Treasure Hunt Smart Contract is deployed at https://sepolia.scrollscan.dev/address/0xfa36ffd97f50c8dE61242c7D42EcCaCfab725d7F
There is also a demo game available live at https://treasure-hunt-scroll.vercel.app/ where you can play the simple implementation of the above contracts.
You can access the entire source code for the tutorial at:
Prerequisites
Noir: Ensure you have Noir installed and ready to use. Follow the official installation guide to get started.
Forge: Familiarity with Forge is essential. Make sure you have it installed and configured correctly.
Having a basic understanding of Solidity will be beneficial as we create our treasure hunt smart contract.
Creating ZK Circuits
Let's create a directory named treasure-hunt-scroll and initialize a new Noir project within it. Run the following command in your terminal:
nargo new circuits
This generates a circuits directory within your project. Inside the src folder, create a file named treasure.nr. This will be our central script for defining the game's logic.
Our Circuit will take some public as well as private inputs such as
Public Inputs -
Array of Riddles, each riddle contains the following:
question: A unique hash representing the riddle itself.answerHash: A combined hash of the answer and its corresponding location.position: A hash of the hidden treasure's location.
there will be two private inputs to the circuit
Private Inputs -
The circuit also utilizes two private inputs:
position: An array containing the x and y coordinates of the treasure's location.answerHash: The keccak256 hash of the user's provided answer.
Treasure Module
First, we define a Riddle struct to encapsulate these riddle components:
use dep::std;

struct Riddle {
    question: Field,
    answerHash: Field,
    position: Field,
}
Next, we create a public function named getRiddleForPos. This function takes the user's guessed position and the array of riddles as input and returns the riddle associated with that specific position.
This function iterates through the riddles and checks if the position hash of any riddle matches the user's guess. If a match is found, that riddle is returned.
pub fn getRiddleForPos(pos: Field, riddles: [Riddle; 3]) -> Riddle {
    let mut riddle = Riddle { question: 0, answerHash: 0, position: 0 };

    for i in 0..3 {
        if {
            riddles[i].position == pos
        } {
            riddle = riddles[i];
        }
    }

    riddle
}
Now that we have the relevant riddle, we can verify if the user's answer is correct. The solveRiddle function takes the retrieved riddle and the user's answer hash as input and returns true if the answer hash matches the riddle's answerHash.
This function simply compares the two hashes, and if they are equal, the function returns true.
pub fn solveRiddle(riddle: Riddle, answerHash: Field) -> bool {
    let mut solved = false;

    if riddle.answerHash == answerHash {
        solved = true;
    }
    solved
}
To retrieve the solution hash, which combines the answer and location, we create the getSolutionHash function. This function takes the answer as a byte array and the position as [x,y] coordinates, returning the combined hash
This function performs the following steps:
Converts the answer byte array to a Field array using the
u8ArrToFieldArrutility function (explained later).Computes individual hashes for the answer and position using the
pedersen_hashfunction.Combines the individual hashes and calculates the final solution hash using
pedersen_hash.
pub fn getSolutionHash<M>(solution: [u8; 32], position: [Field; 2]) -> Field {
    let mut sol: [Field; 32] = u8ArrToFieldArr(solution);

    let solHash = std::hash::pedersen_hash(sol);
    let posHash = std::hash::pedersen_hash(position);

    let hash = std::hash::pedersen_hash([solHash, posHash]);
    hash
}
The u8ArrToFieldArr function serves as a helper, this function iterates through the byte array and converts each element to a Field element, suitable for further mathematical operations within the circuit.
pub fn u8ArrToFieldArr<N>(data: [u8; N]) -> [Field; N] {
    let mut fieldData: [Field; N] = [0; N];
    for i in 0..N {
        fieldData[i] = data[i] as Field;
    }
    fieldData
}
With these tools in hand, we introduce the constructRiddle function. This function takes the riddle's question, position, and actual answer hash as input and returns the complete riddle structure.
This function performs the following tasks:
Hashes the question using
u8ArrToFieldArrandpedersen_hash.Employs
getSolutionHashto calculate the combined answer and position hash.Hashes the position using
pedersen_hash.Creates the
Riddlestruct with the computed hashes and returns it.
pub fn constructRiddle<N, M>(question: [u8; N], position: [Field; 2], answerHash: [u8; 32]) -> Riddle {
    let questionHash = std::hash::pedersen_hash(u8ArrToFieldArr(question));
    let answerHash = getSolutionHash(answerHash, position);
    let positionHash = std::hash::pedersen_hash(position);

    let riddle = Riddle { question: questionHash, answerHash, position: positionHash };
    riddle
}
Main Entrypoint
Now that we have our treasure hunt logic solidified, let's dive into the main.nr file within the src directory. Here, we'll pass the core logic.
First, we import the treasure module containing our riddle-related code and the std module for standard functionalities:
mod treasure;
use dep::std;
The main function serves as the entrypoint of the treasure hunt experience. It takes three arguments:
riddles: A public array containing all riddles for the game.position: The private array representing the treasure's location (x, y coordinates).answerHash: The private hash of the user's provided answer.Verifying the Position:
The function calculates the
posHashfrom the givenposition.It then retrieves the riddle associated with that position using the
getRiddleForPosfunction from thetreasuremodule.An assertion ensures that a riddle actually exists for the chosen position, preventing invalid attempts.
Solving the Riddle:
The
solveRiddlefunction is called, passing the retrieved riddle and the calculatedanswerHash(combined hash of answer and position).Another assertion verifies if the answer hash matches the riddle's solution, confirming if the user solved it correctly.
mod treasure;
use dep::std;

fn main(riddles: pub [treasure::Riddle; 3], position: [Field; 2], answerHash: [u8; 32]) {
    let posHash = std::hash::pedersen_hash(position);
    let riddle = treasure::getRiddleForPos(posHash, riddles);

    assert(riddle.position == posHash, "No Riddle found for position");

    let result = treasure::solveRiddle(riddle, treasure::getSolutionHash(answerHash, position));
    assert(result == true, "Riddle not solved");
}
But how do we get the riddles for the circuit? Remember our constructRiddle function? It's time to put it to work!
We create a getRiddles function that returns the pre-filled riddle array. Each riddle is constructed using constructRiddle, providing the question, position, and solution hash (pre-computed using keccak256).
fn getRiddles() -> [treasure::Riddle; 3] {
    let mut riddle = treasure::Riddle { question: 0, answerHash: 0, position: 0 };
    let mut riddles: [treasure::Riddle; 3] = [riddle; 3];

    riddles[0] = treasure::constructRiddle(
        "I am the block number on the Ethereum blockchain where The DAO incident took place. I caused a significant community discussion and a subsequent fork. Which block number am I?".as_bytes(),
        [26, 32],
        std::hash::keccak256("1920000".as_bytes(), "1920000".as_bytes().len() as u32)
    );

    riddles[1] = treasure::constructRiddle(
        "I am a consensus algorithm introduced to Ethereum to replace proof-of-work. I involve validators who lock up a certain amount of cryptocurrency to validate blocks. What is my name?".as_bytes(),
        [32, 28],
        std::hash::keccak256("Casper".as_bytes(), "Casper".as_bytes().len() as u32)
    );

    riddles[2] = treasure::constructRiddle(
        "In 2014, I became the first cryptocurrency to implement the X11 hashing algorithm, aiming for increased security and energy efficiency. What is my name?".as_bytes(),
        [4, 2],
        std::hash::keccak256("Dash".as_bytes(), "Dash".as_bytes().len() as u32)
    );

    riddles
}
now lest write a test for out code, first we will get all the riddles using the getRiddles function and using the position of the treasure and the answer we will create the private inputs for the circuits and then we will call the main function with the parameters.
#[test]
fn test_correct() {
    let riddles  = getRiddles();
    let position = [32, 28];
    let answer = std::hash::keccak256("Casper".as_bytes(), "Casper".as_bytes().len() as u32);
    main(riddles, position, answer);
}
Now that we've crafted the zk-circuits, let's test them to ensure everything functions as intended. Use the following commands in your terminal:
nargo check # Checks for any errors in the circuit code
nargo compiles # Compiles the circuits for use
nargo test # Runs test cases to verify circuit functionality
If all goes well, you'll see a clean console, signaling success!
Congratulations, you've built the foundational zk-circuits for your treasure hunt!
Generating Solidity Verifier
Next, we'll translate this circuit logic into a Solidity verifier contract. This contract interacts with users and verifies their proofs without revealing sensitive information. To generate the Solidity code, run the following command:
nargo codegen-verifier
This creates a new file called treasure-hunt-scroll/circuits/contract/circuits/plonk_vk.sol. This file contains the Solidity code for your verifier contract, ready to be integrated into your application.
With the circuits built and the verifier contract generated, we're well-equipped to move forward in the next part of the tutorial.
Treasure Hunt Smart Contract
Now, let's craft the Solidity contract that brings your zk-powered treasure hunt to life. Navigate to the root of your project and initialize a new Forge project
forge init contracts
Importing Modules
Integrating the Verifier:
Copy the circuits directory from your treasure-hunt-scroll/circuits/contracts folder to contracts/src. This directory contains the generated Solidity verifier code.
Next, create a new file named TreasureHunt.sol within the src directory. This file will be the contract logic.
We will start by adding the license identifier and compiler version:
// SPDX-License-Identifier: MIT
pragma solidity ^0.8.13;
Import the UltraVerifier contract from the generated verifier code:
import {UltraVerifier} from "./circuits/plonk_vk.sol";
State Variables
Then we will define the TreasureHunt contract and declare state variables, These variables manage:
verifier: Stores the address of the generated verifier contract.COST_PER_DIG: Defines the cost in tokens for each attempt to find the treasure.REWARD_PER_DIG: Specifies the reward in tokens for successfully solving a riddle.hasStarted: Maps addresses to booleans, indicating if they've started the game.balances: Maps addresses to their in-game token balances.
contract TreasureHunt {
    UltraVerifier public verifier;

    uint256 public constant COST_PER_DIG = 100;
    uint256 public constant REWARD_PER_DIG = 150;

    mapping(address => bool) public hasStarted;
    mapping(address => uint256) public balances;
}
then we will implement events to log player actions, these events will be emitted when players start the game and attempt to dig for the treasure.
event GameStarted(address indexed player);
event Dig(address indexed player);
and we will also set the verifier address in the constructor.
constructor(address _verifier) {
    verifier = UltraVerifier(_verifier);
}
Start Game Functions
To start the game we will define functions for players to begin or restart their treasure hunt journey.
These functions:
Ensure players haven't already started before initiating the game.
Reset player state (started and balance) for a fresh start.
Emit events to signal the game start or restart.
function startGame() public {
    require(!hasStarted[msg.sender], "TreasureHunt: already started");
    hasStarted[msg.sender] = true;
    balances[msg.sender] = 1000;

    emit GameStarted(msg.sender);
}

function restartGame() public {
    require(hasStarted[msg.sender], "TreasureHunt: not started");
    hasStarted[msg.sender] = true;
    balances[msg.sender] = 1000;

    emit GameStarted(msg.sender);
}
Dig Function
Now it's time to implement the heart of the game: the dig function. This function allows players to attempt to find the treasure by submitting a zk-proof. Here's a breakdown of its steps:
Preparing the Public Inputs:
Constructing the Public Input Array: The function creates a
bytes32array namedpublicInputswith nine elements. These elements represent the public inputs for the circuit, which are essentially the three riddles. Each riddle is represented by a combination of three hashes: question, answer hash, and position hash.Hardcoded Riddles: Currently, the function has hardcoded values for the public inputs. These values represent pre-defined riddles for testing purposes. In a real-world scenario, you'd dynamically generate or store these riddles elsewhere.
Verifying the Proof:
Calling the Verifier: The function calls the
verifyfunction on theverifiercontract. This function takes the user's submitted proof (_proof) and the constructed public inputs (publicInputs) as arguments.Proof Evaluation: The
verifyfunction within the verifier contract evaluates the zk-proof against the circuit and the public inputs. If the proof is valid, it means the user has successfully solved the riddles without revealing the answers or location.
Rewarding Success:
Balance Update: Based on the proof verification result (
verified):If the proof is valid, the user's balance increases by the
REWARD_PER_DIGminus theCOST_PER_DIG.If the proof is invalid, the user's balance decreases by the
COST_PER_DIG.
Emitting Event: The
Digevent is emitted, logging the player's attempt and outcome.
function dig(bytes calldata _proof) public {
    bytes32[] memory publicInputs = new bytes32[](9);

    publicInputs[0] = bytes32(0x1bbce9cea5e7f0b77946a24ea35bbfec547d60fb1fd7eabc24478369d4c6d61a);
    publicInputs[1] = bytes32(0x2872e4a813d9da8cf8f3298cadb8bf22de5658571d081514f660f7669bcd994c);
    publicInputs[2] = bytes32(0x1e8bde3822665ae60296fd4d6072417000a46b2439afc34bc2138f08a14a9d9a);

    publicInputs[3] = bytes32(0x06e3828c348e040d12e17f6823e2ae6d75045df3a87cccbc8615a3a9e4883b38);
    publicInputs[4] = bytes32(0x029ea07c6f140ba740bf3ae4904fe9b8128804dcc0b1f17a03f7cb85e947408c);
    publicInputs[5] = bytes32(0x2f42c1aaeee52ebe7643cd3d9847a96809b95e153033cf3bdb26ede86501c042);

    publicInputs[6] = bytes32(0x0b4580226c6354964e91caf8e39e778e80314ac490038cf5474a818797c9aeb7);
    publicInputs[7] = bytes32(0x1ae4689a3fb9d86b27199fe529ed6125ee18308febef0809c3b5dc8dbdc07561);
    publicInputs[8] = bytes32(0x0255a6f0edfa87588206a8ecd349b2696e8a89ff58ddeb95bd211fbe8e0ba3c8);
    bool verified = verifier.verify(_proof, publicInputs);

    if (verified) {
        balances[msg.sender] += (REWARD_PER_DIG - COST_PER_DIG);
    } else {
        balances[msg.sender] -= COST_PER_DIG;
    }

    emit Dig(msg.sender);
}
Retrieving Public Inputs for Testing:
To obtain the correct riddle hashes, follow these steps:
Add the following code in the test circuit function:
  for i in 0..3 {
     print(riddles[i].question);
     print(riddles[i].answerHash);
     print(riddles[i].position);
 }
Run the following command to print the riddles in the test function.
nargo test --show-outputExtract the question, answer hash, and position hash for each riddle.
Replace the placeholder values in the
publicInputsarray with the actual extracted hashes.
Deploying to Scroll
Now it's time to deploy your treasure hunt contract to the Scroll network! Here's a breakdown of the process:
Setting Up Environment Variables:
Private Key: Store your private key securely in an environment variable named
PRIVATE_KEY.Scroll RPC URL: Define the Scroll Sepolia RPC URL in the
SCROLL_RPC_URLenvironment variable.Scroll Etherscan API Key: Obtain an API key for Scroll Etherscan and store it in
SCROLL_ETHERSCAN_API_KEY.
PRIVATE_KEY=your_private_key
SCROLL_RPC_URL=scroll_sepolia_rpc_url
SCROLL_ETHERSCAN_API_KEY=scroll_etherscan_url
Configuring Foundry:
Update your foundry.toml file with the following entries:
[rpc_endpoints]
scroll = "${SCROLL_RPC_URL}"

[etherscan]
534351 = { key = "${SCROLL_ETHERSCAN_API_KEY}" ,url = "https://api-sepolia.scrollscan.com/api"}
Next create a new file named Deploy.s.sol in the contracts/script directory.
We will start by importing necessary modules
// SPDX-License-Identifier: MIT
pragma solidity ^0.8.13;

import "forge-std/Script.sol";

import {TreasureHunt} from "../src/TreasureHunt.sol";
import {UltraVerifier} from "../src/circuits/plonk_vk.sol";
Then we will implement the run function, this function deploys the UltraVerifier contract and then the TreasureHunt contract, passing the verifier address as an argument.
contract Deploy is Script {
    function run() external {
        TreasureHunt hunt;
        UltraVerifier verifier;
        uint256 deployerPrivateKey = vm.envUint("PRIVATE_KEY");

        vm.startBroadcast(deployerPrivateKey);

        verifier = new UltraVerifier();
        hunt = new TreasureHunt(address(verifier));

        vm.stopBroadcast();
    }
}
Load the environment variables
source .env # load env fileRun the deployment script:
forge script script/Deploy.s.sol:Deploy --rpc-url $SCROLL_RPC_URL --broadcast --verify -vvvv --legacyVerify the contract on Scroll Etherscan
forge verify-contract -c 534351 --watch --constructor-args $(cast abi-encode "constructor(address)" "0x5F693b112d26872c1533921CcC735fdf37815847") 0xfa36ffd97f50c8dE61242c7D42EcCaCfab725d7F src/TreasureHunt.sol:TreasureHunt
- Replace
0xfa36ffd97f50c8dE61242c7D42EcCaCfab725d7Fwith the actual deployed address.
Testing Contract
Now that your contract is deployed on Scroll, let's put it to the test and see if adventurers can claim their treasure!
Generating Proofs:
Head to the
circuitsfolder and open theProver.tomlfile.Paste the following details into the file, replacing placeholders with actual values from your test case
answerHash= ["123", "180", "192", "178", "132", "22", "64", "218", "16", "225", "136", "143", "71", "10", "53", "19", "209", "132", "44", "178", "204", "93", "117", "211", "2", "244", "51", "94", "48", "153", "151", "40"]
position = ["32", "28"]

[[riddles]]
answerHash = "0x2872e4a813d9da8cf8f3298cadb8bf22de5658571d081514f660f7669bcd994c"
position = "0x1e8bde3822665ae60296fd4d6072417000a46b2439afc34bc2138f08a14a9d9a"
question = "0x1bbce9cea5e7f0b77946a24ea35bbfec547d60fb1fd7eabc24478369d4c6d61a"

[[riddles]]
answerHash = "0x029ea07c6f140ba740bf3ae4904fe9b8128804dcc0b1f17a03f7cb85e947408c"
position = "0x2f42c1aaeee52ebe7643cd3d9847a96809b95e153033cf3bdb26ede86501c042"
question = "0x06e3828c348e040d12e17f6823e2ae6d75045df3a87cccbc8615a3a9e4883b38"

[[riddles]]
answerHash = "0x1ae4689a3fb9d86b27199fe529ed6125ee18308febef0809c3b5dc8dbdc07561"
position = "0x0255a6f0edfa87588206a8ecd349b2696e8a89ff58ddeb95bd211fbe8e0ba3c8"
question = "0x0b4580226c6354964e91caf8e39e778e80314ac490038cf5474a818797c9aeb7"
- Run the following command in your terminal:
nargo prove
This will generate a proof file called circuits.proof in the circuits/proofs directory.
Calling Functions
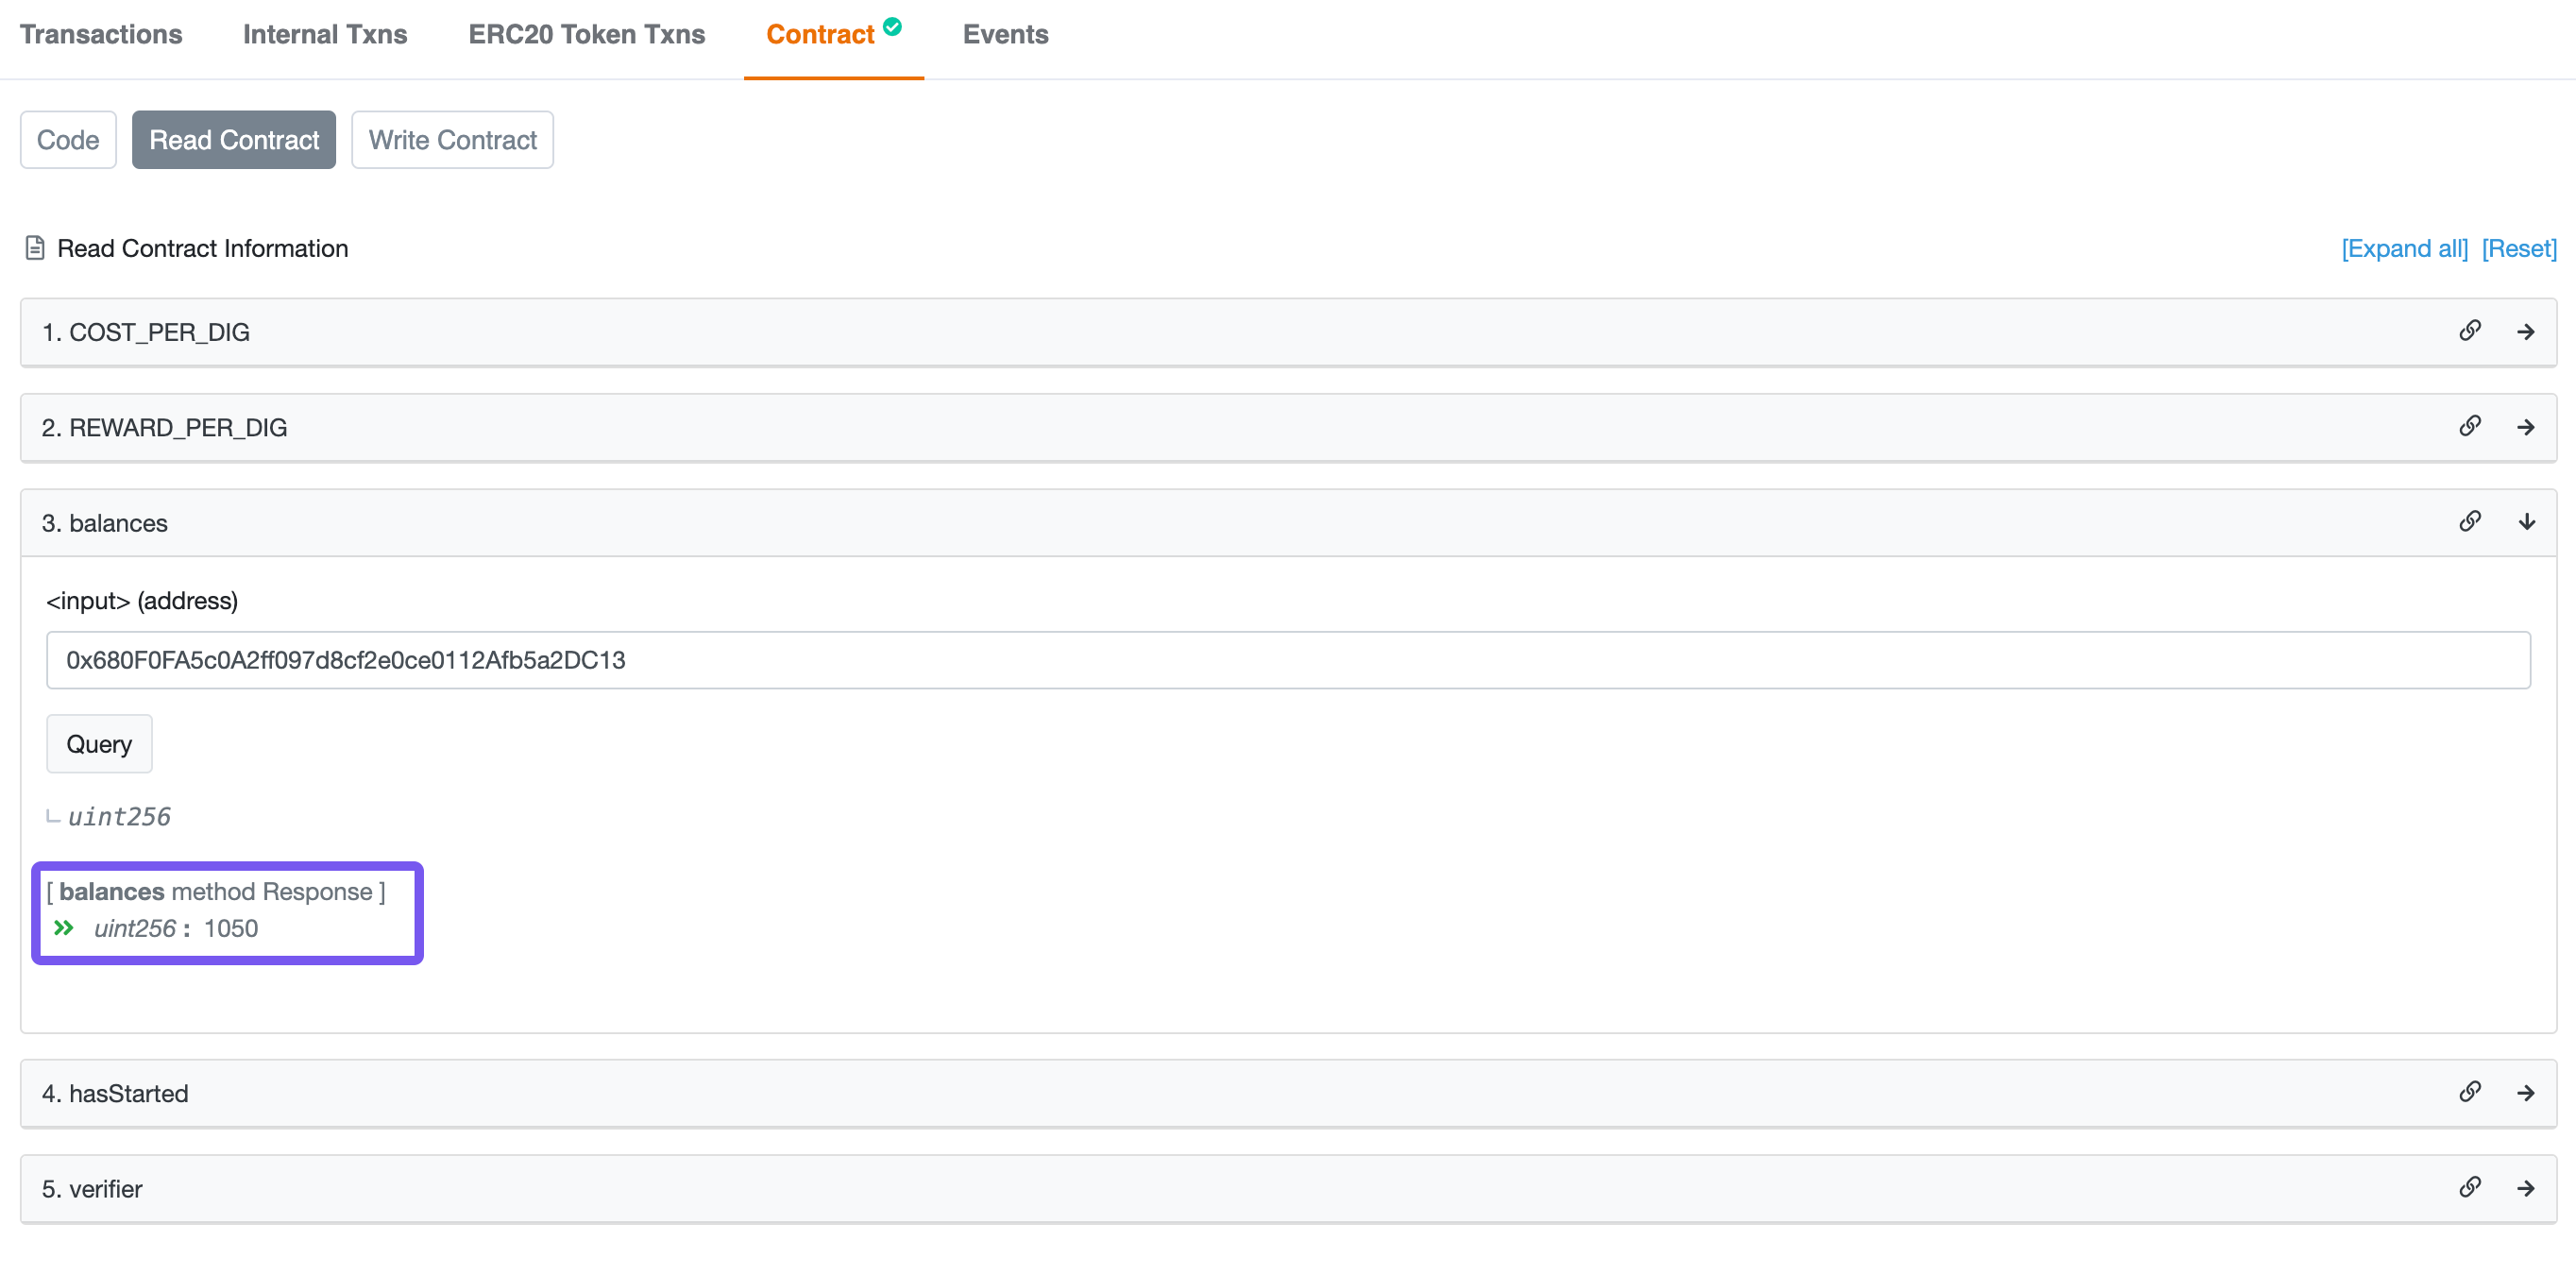
Open your deployed contract on Scroll Etherscan.
Execute the "startGame" function and verify that your balance starts at 1000 (assuming your starting balance).

Copy the value from the
circuits.proofsfile, ensuring it starts with0xto represent bytes.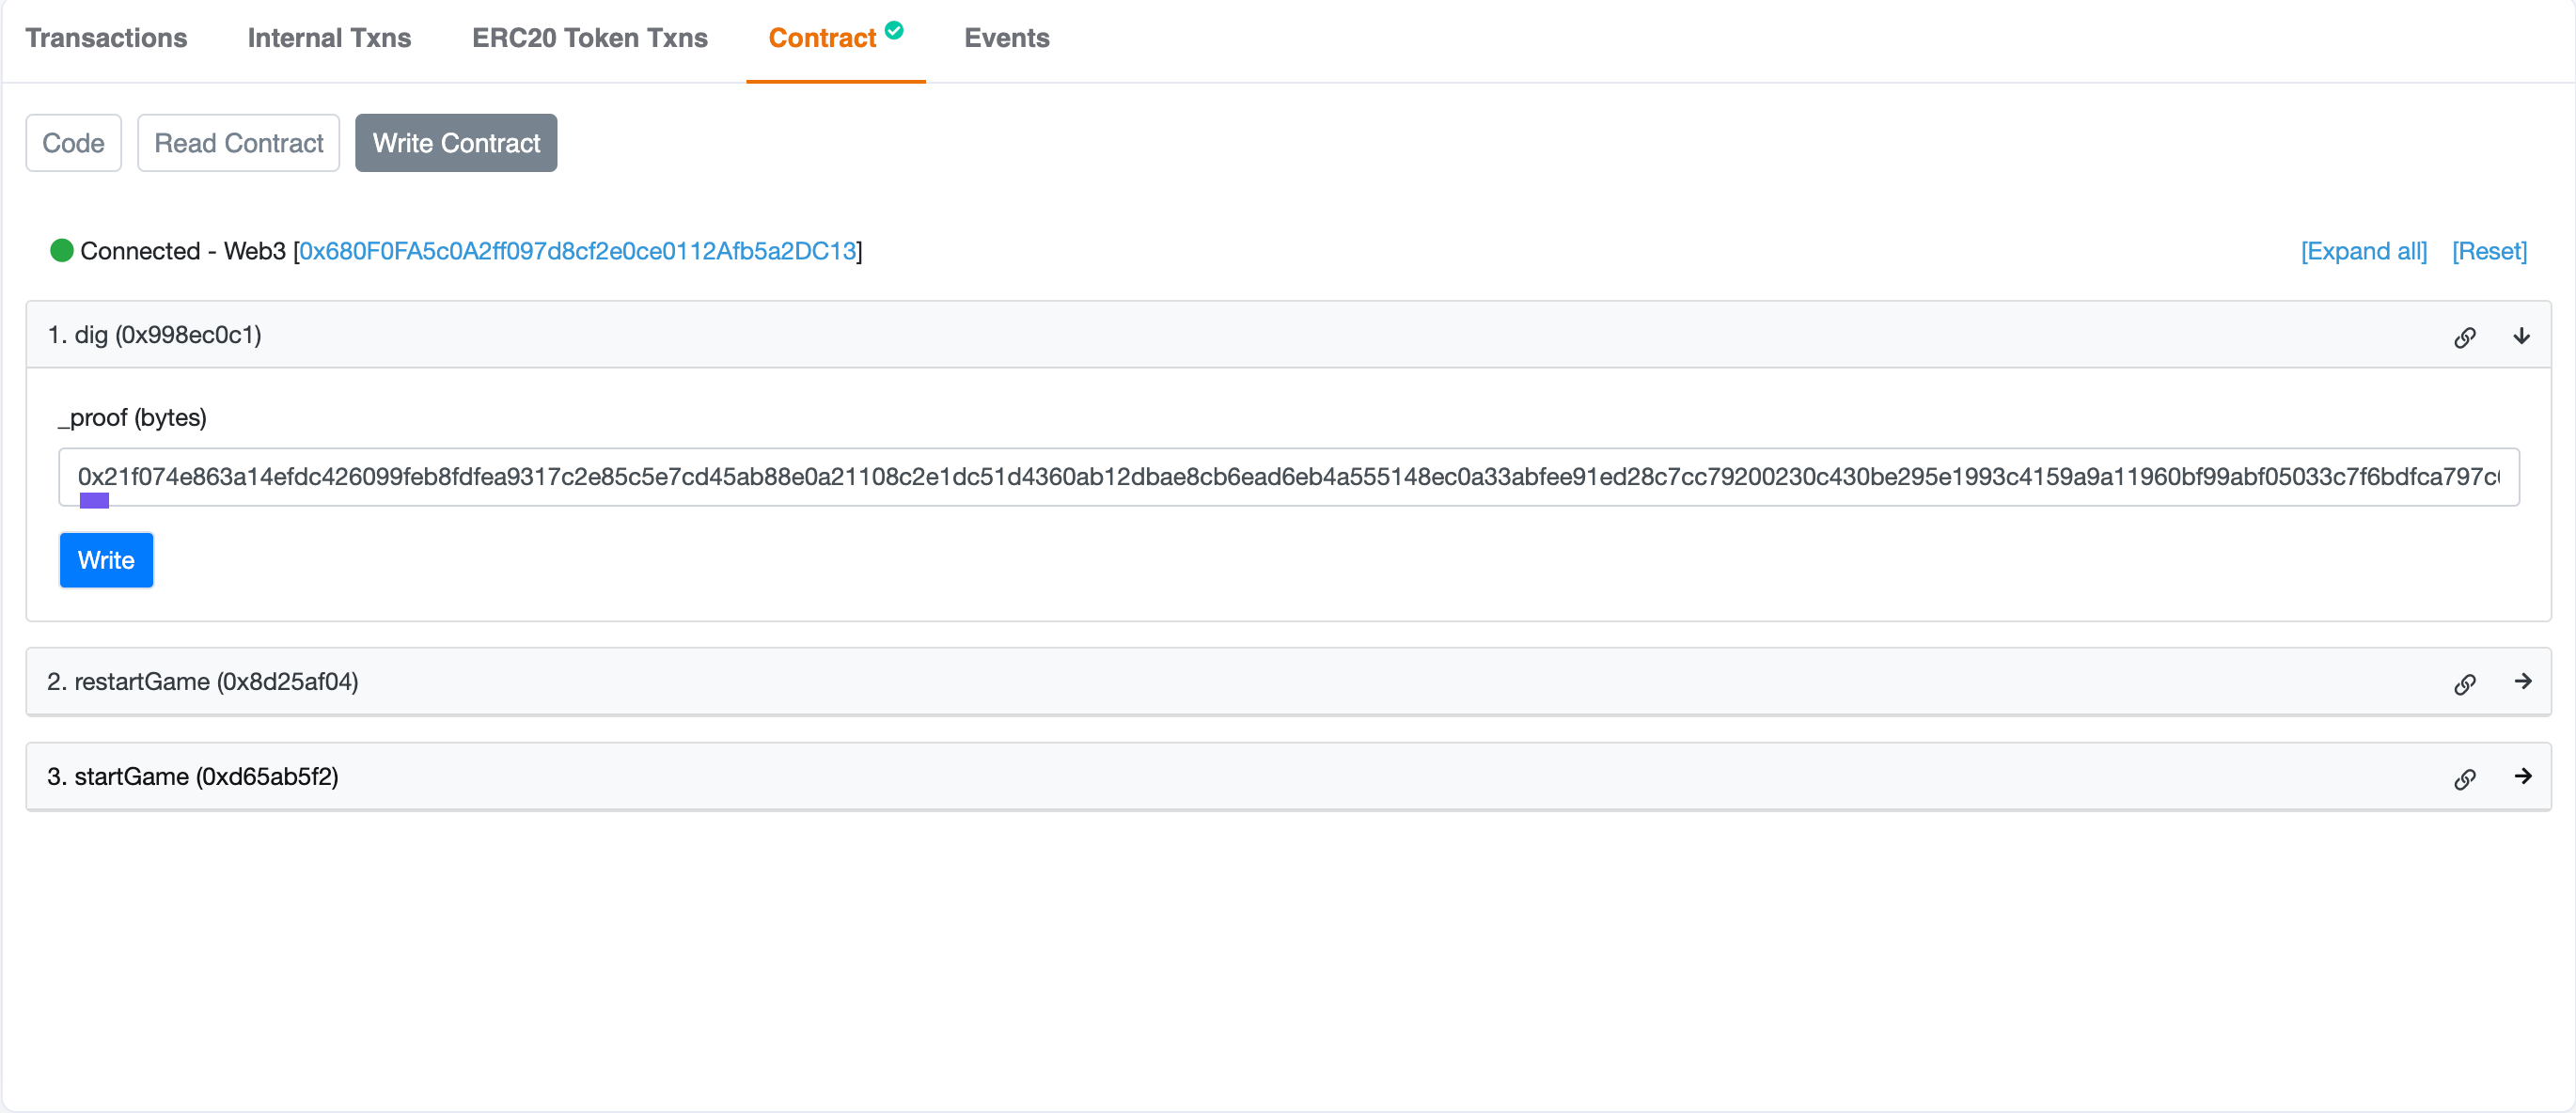
Paste the copied proof into the "dig" function input on the contract page.
Click "Dig."
If the execution completes successfully, check your balance again. It should now be 1050, signifying that you've successfully proven you know the treasure location and riddle answers without revealing the actual values!
This demonstrates how users can interact with your treasure hunt contract, using zk-proofs to verify their knowledge without exposing sensitive information. Remember to replace the placeholders with your actual values for a functional test.
Congratulations! You've built and deployed a zk-powered treasure hunt, ready to challenge and reward adventurous players on the Scroll network.
Feeling Adventurous
Dynamic Riddles: Instead of hardcoded questions, create a system that generates riddles dynamically. This could involve randomizing elements, incorporating external data feeds, or even user-submitted content.
Security Enhancements: Introduce features like EdDSA signatures and commitment schemes. Signatures can verify the authenticity of proofs, while commitments lock in values before revealing them, preventing double spending or manipulation.
There is also a demo game available live at https://treasure-hunt-scroll.vercel.app/ where you can play the simple implementation of the above contracts.